In this guide, you will learn how to connect Apiframe to n8n so you can generate AI images (or videos, music, etc.) from any workflow.
We will cover:
- What we're building
- Prerequisites
- Creating Apiframe credentials in n8n
- Workflow 1 - Simple image generation using
/imagine - Workflow 2 - Polling results with
/fetch - Workflow 3 - Recommended: Using webhooks for real-time results
- Extending the pattern to other Apiframe endpoints
All examples will use the Midjourney /imagine endpoint, but the same pattern works for most of the other endpoints and models.
I. What we're going to build
We’ll build two small n8n integrations:
- Generate an image on demand
- Trigger: Manual, Webhook, Google Sheet, anything
- HTTP Request:
POST https://api.apiframe.pro/imagine - Get back a
task_idYou can store or log
- Get the final images automatically
- By polling Apiframe with /fetch until the task is complete
- Or (recommended) let Apiframe call n8n Webhook when the task is complete
Once the image URLs land in n8n, you can do anything: send them to Slack, store them in Airtable, Google Drive, etc.
II. Prerequisites
You will need:
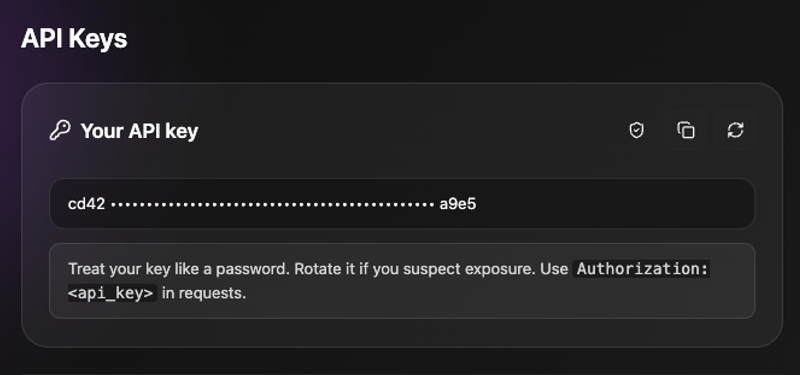
- An Apiframe account and an API key. You can grab this from your Apiframe dashboard (or Click here). This API key will be used to authenticate our requests via the
Authorizationheader.
- An n8n instance (self-hosted or cloud)
- Basic familiarity with n8n nodes (HTTP Request, Webhook, Set, IF, etc.). The HTTP Request node is the generic way to call any REST API in n8n.
III. Create Apiframe credentials in n8n
We’ll configure credentials once, then reuse them in all HTTP Request nodes.
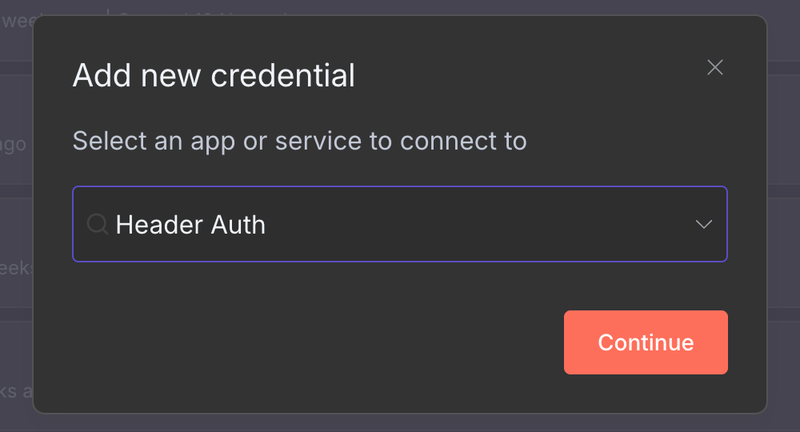
- Step 1: In n8n, go to Credentials → Create credential.

- Step 2: Choose Header Auth (or "HTTP Header Auth", "API Key in Header" depending on your version)
- Step 3: Configure:
- Header name:
Authorization - Value: your Apiframe API key (exactly as shown in your dashboard)
- Header name:
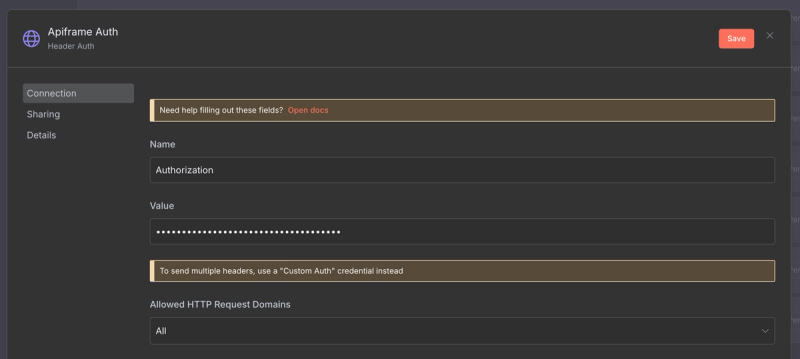
- Step 4: Give it a name like Apiframe Auth and save
Apiframe expects:
Authorization: YOUR_API_KEY
Content-Type: application/json
IV. Workflow 1 - Basic image generation with /imagine
We’ll build a simple workflow:
1. Create the workflow
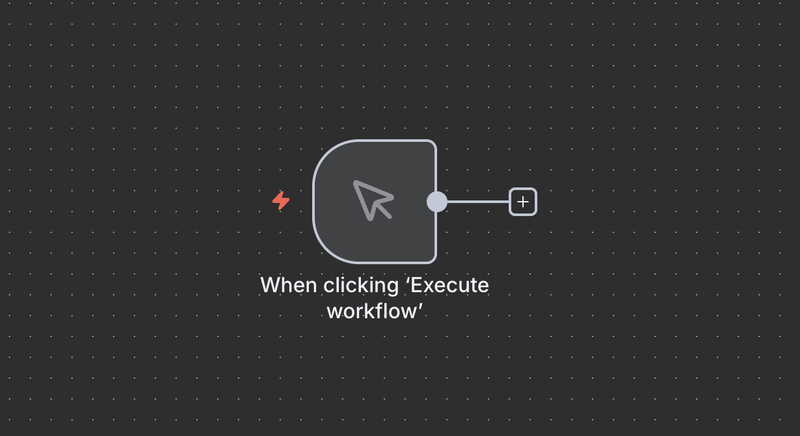
- In n8n, create a New workflow.
- Add a Manual Trigger node.
2. Add a "Set" node for the prompt
- Add a Set node after the Manual Trigger.
- In Values → Add Field → String:
- Name:
prompt - Value: something like
a cinematic photo of a cyberpunk city at night, ultra detailed, 4k
- Name:
- (Optional) Add another string field:
- Name:
aspect_ratio - Value:
3:2
- Name:
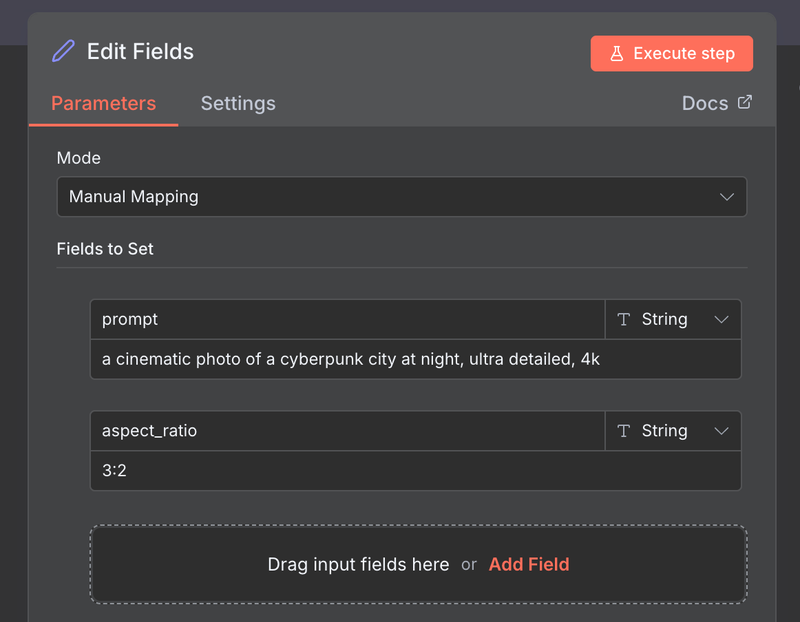
Now the Set node’s output JSON looks roughly like:
{
  "prompt": "a cinematic photo of a cyberpunk city at night, ultra detailed, 4k",
  "aspect_ratio": "3:2"
}
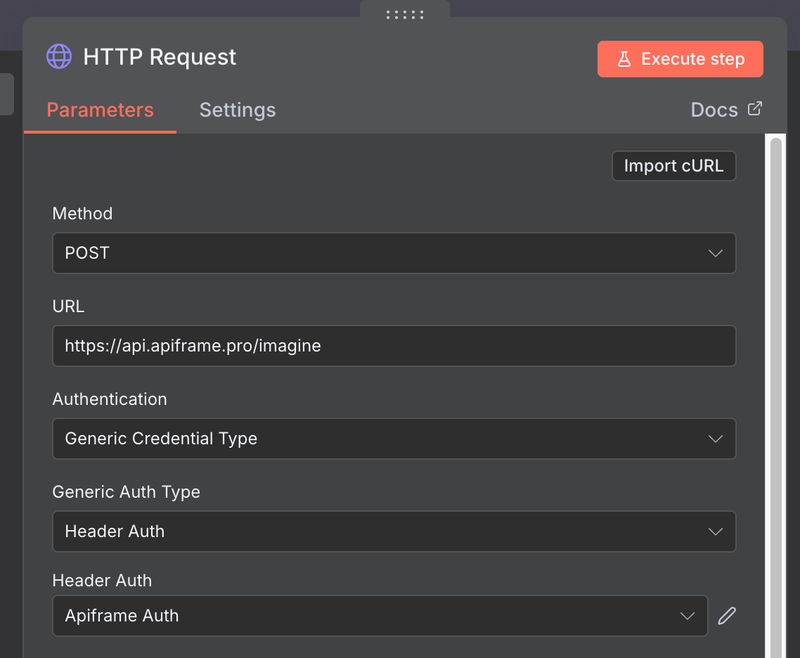
3. Add the HTTP Request node for /imagine
- Add an HTTP Request node after the Set node.
- Configure:
- Method:
POST - URL:
https://api.apiframe.pro/imagine - For authentication, choose the "Generic Credential type", then "Header Auth", then the “Apiframe Auth” credentials you created earlier.
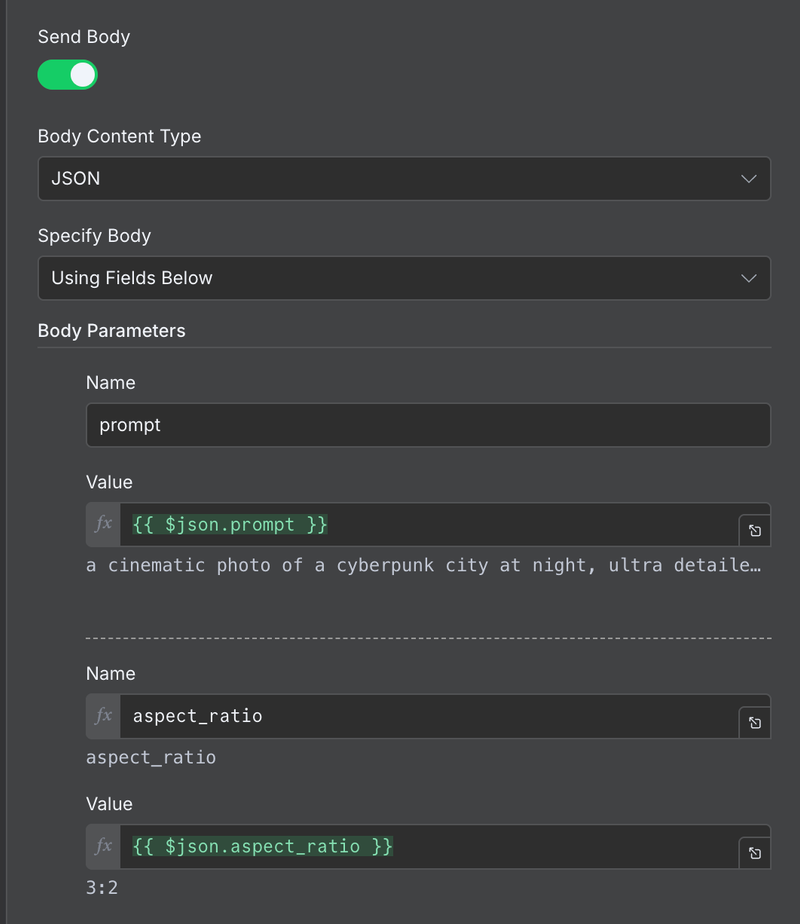
- For the body, turn on "Send body", and let's add our fields: prompt, aspect_ratio, and optionally webhook_url for later.
- Method:
When you execute this node, Apiframe returns something like:
{
  "task_id": "29e983ca-7e86-4017-a9e3-ef6fe9cd5f2a"
}
This means the task is queued/processing. Images are generated asynchronously; you don’t get the final URLs from /imagine itself.
You can now:
- Log the
task_id - Store it in a DB / Google Sheet
- Pass it forward to a “Fetch” workflow
V. Workflow 2 - Polling Apiframe with /fetch
Now let’s get the actual image URLs using the /fetch endpoint.
Apiframe exposes a POST https://api.apiframe.pro/fetch endpoint that takes task_id and returns either the final result or a status: "processing" response.
We’ll do a minimal “Wait then Fetch” flow.
1. Add a Wait node
After the /imagine HTTP Request node:
- Add a Wait node.
- Set it to wait, for example, 2–3 seconds.
This gives Apiframe time to finish the generation. Generation time depends on the task's complexity and the system load.

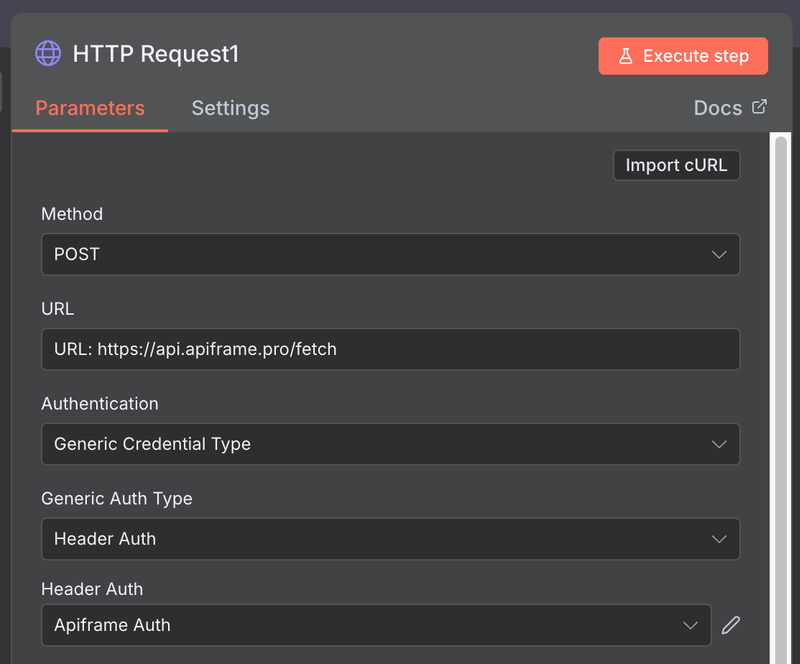
2. Add the /fetch HTTP Request node
Add another HTTP Request node after the Wait node:
- Method:
POST - URL:
https://api.apiframe.pro/fetch - For authentication, choose the "Generic Credential type", then "Header Auth", then the “Apiframe Auth”, like before.
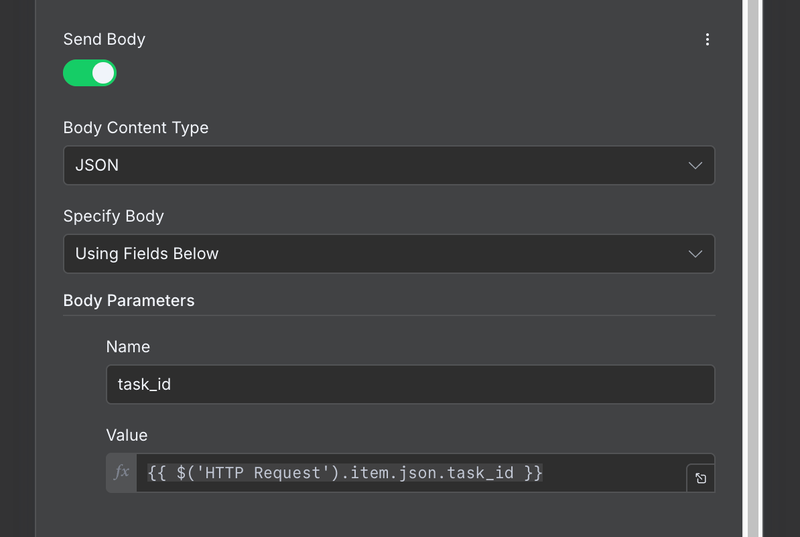
- For the body, turn on "Send body", and let's add our
task_idfield
Processing (job still running):
{
  "task_id": "29e983ca-7e86-4017-a9e3-ef6fe9cd5f2a",
  "task_type": "imagine",
  "status": "processing",
  "percentage": "40"
}
Completed (job done, image URLs ready):
{
  "task_id": "29e983ca-7e86-4017-a9e3-ef6fe9cd5f2a",
  "task_type": "imagine",
  "original_image_url": "https://.../grid.png",
  "image_urls": [
    "https://.../image1.png",
    "https://.../image2.png",
    "https://.../image3.png",
    "https://.../image4.png"
  ]
}
3. Handling “still processing”
For a quick dev setup, you can:
- Just wait longer and fetch once.
- Or add a simple IF node after the Fetch:
- Condition:
statusequals"processing" - If “true”: branch to another Wait + Fetch
- If “false”: continue with your final logic (Slack, Airtable, etc.)
- Condition:
In production, Apiframe recommends using webhooks instead of polling to avoid unnecessary requests and get instant updates.
Let’s do that next.
VI. Workflow 3 - Webhook-based results (recommended)
This is the clean, “real-time” architecture:
- Workflow A: Send generation request (with
webhook_urlandwebhook_secret) - Workflow B: Receive webhook from Apiframe when generation is done
1. Create Workflow B - The webhook receiver
- Create a New workflow in n8n and name it
Apiframe – Image Completed. - Add a Webhook node.
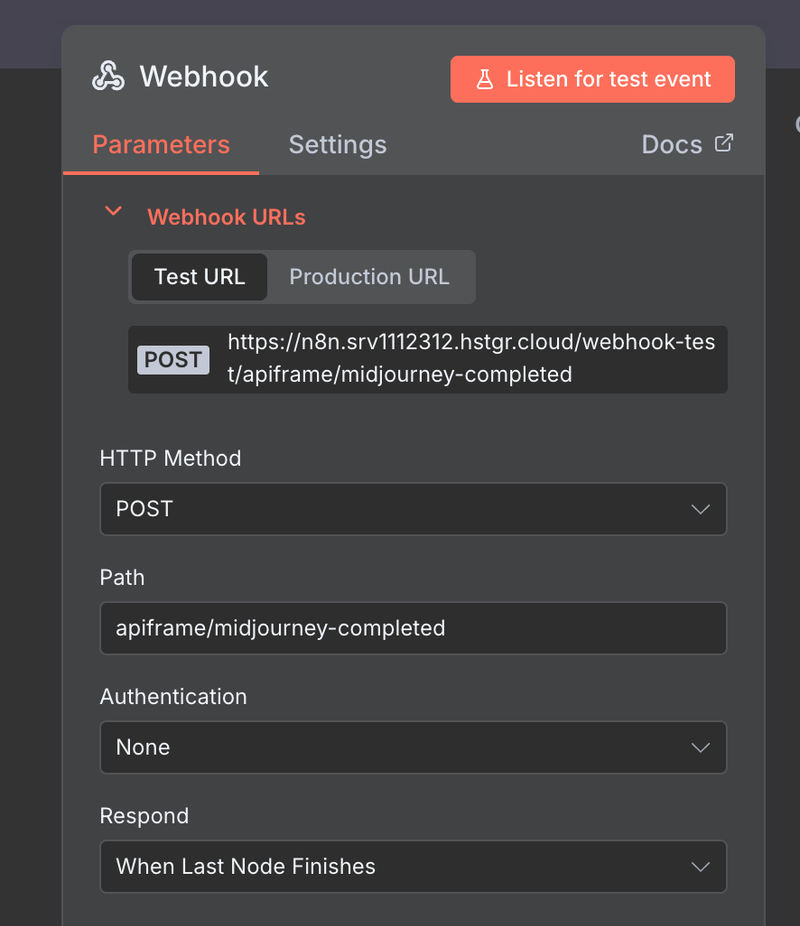
Configure the Webhook node:
- HTTP Method:
POST - Path: something like
apiframe/midjourney-completed - Response mode:
- For example,
When Last Node Finishes(so you can return data back if you want).
- For example,
- HTTP Method:
Copy the Production URL – this is what we’ll set as webhook_url in Apiframe.
2. Secure the webhook with "webhook_secret"
Apiframe lets you pass a webhook_secret in the /imagine request; it will send it back as x-webhook-secret header on webhook calls.
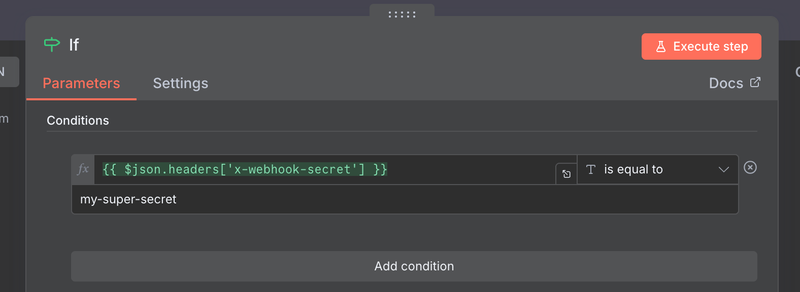
- Add an IF node after the Webhook node.
- In the IF node, check:
- Left side: Expression like
={{ $json["headers"]["x-webhook-secret"] }} - Condition:
equals - Right side: your secret, e.g.
my-super-secret
- Left side: Expression like
- If the secret doesn’t match, go to a branch that just ends (or logs the attempt).
This ensures only Apiframe’s webhooks are processed.
3. Accessing the image URLs in the webhook payload
The webhook body will look like the same “completed” payload shown earlier:
{
  "task_id": "29e983ca-7e86-4017-a9e3-ef6fe9cd5f2a",
  "task_type": "imagine",
  "original_image_url": "https://.../grid.png",
  "image_urls": [
    "https://.../image1.png",
    "https://.../image2.png",
    "https://.../image3.png",
    "https://.../image4.png"
  ]
}
You can access the image URLs, then pass them into:
- Slack node (send a message with the URL)
- Airtable / Notion (store the URL)
- HTTP Request (push to your app’s backend)
4. Update Workflow A to use the webhook
Return to Workflow A (the one calling /imagine) and edit the HTTP Request node body to include:
webhook_urlwebhook_secret
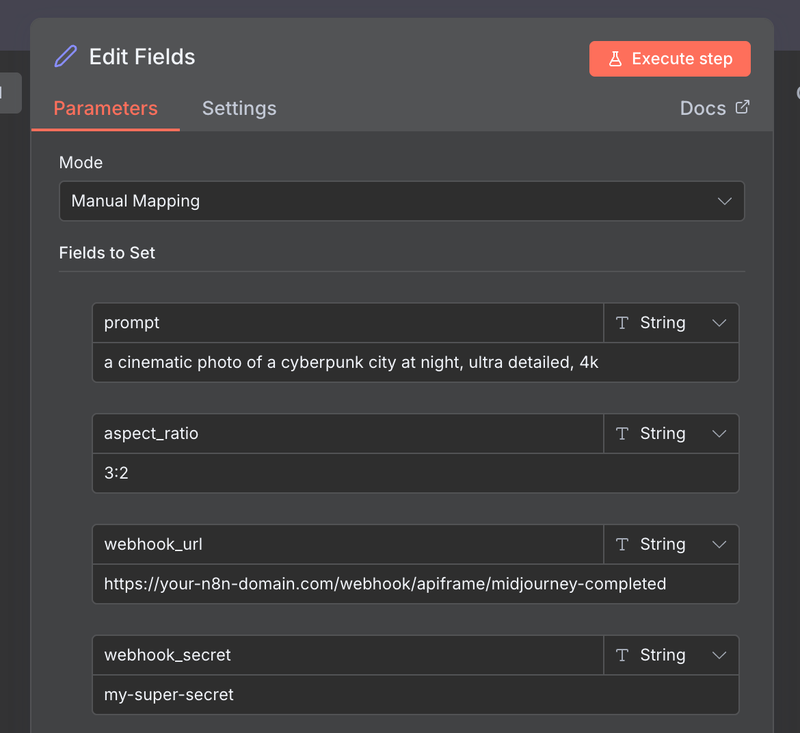
Example JSON body in the HTTP Request node:
{
  "prompt": "a cinematic photo of a cyberpunk city at night, ultra detailed, 4k",
  "aspect_ratio": "3:2",
  "webhook_url": "https://your-n8n-domain.com/webhook/apiframe/midjourney-completed",
  "webhook_secret": "my-super-secret"
}
Now the flow is:
- Workflow A →
/imaginewithwebhook_url+webhook_secret - Apiframe generates the image in the background
- When done, Apiframe calls your Webhook (Workflow B) with the final URLs
- Workflow B processes them and pushes them wherever you want
No polling, no extra HTTP requests – just event-driven.
VII. Extending this pattern to other Apiframe endpoints
The nice part: once you’ve wired n8n → Apiframe once, you can reuse the same pattern for everything.
Some ideas:
- Variations: switch the URL to
https://api.apiframe.pro/variationsand send the originaltask_id+ new prompt. - Upscales: same auth, different endpoint/body.
- Faceswap: send two image URLs (source & target) to the
faceswapendpoint. - Describe: build an n8n workflow where you drop an image URL and Apiframe returns a prompt for it.
- Other media: Flux, Ideogram, Luma, Suno, etc. all follow the same REST pattern:
POSTwith JSON, includewebhook_url+webhook_secretif you want webhooks.
Each of these becomes just another HTTP Request node (or two, if you also use /fetch) using the same “Apiframe Auth” credentials.
VIII. Wrap-up
You now have:
- A basic
/imagineworkflow to trigger Midjourney via Apiframe in n8n - A polling setup using
/fetchfor quick experiments - A webhook-based architecture for real-time, production-grade pipelines